TERA Guides
Sky Cruiser Endeavor Guide
Normal Mode
Introduction
This dungeon is a tough one when you are learning due to the mechanics that you have to keep track of. It is recommended to do this dungeon when you have at least Ambit gear or higher so you can tank some of the hits. There is also a DPS race mechanic on the first and on the second boss so you will also want to make sure your party can kill the boss fast enough or else your party will have a tough time on the first boss and wipe on the second boss. Coordination is key for this dungeon as the mechanics will require you to group up, get away from each other, and position yourself correctly to effectively avoid confusion from happening.
Note: all the of names of the attacks here are arbitrary and are not the name of the official attacks.
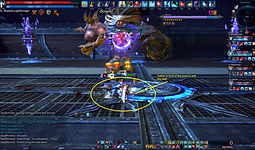
Boss #1: Putrion
This boss is relatively easy with not a lot of special mechanics or anything. The only thing
is that before you are allowed to even touch this boss, you have to defeat his waves of
lackeys first. In order to clear the minions that spawn efficiently, have the tank pull the
mobs towards one of the corners of the room and tank them there. That way the DPS can
use their AOE to clear out the mobs. Periodically throughout this phase, a large mob will
spawn (he will be instantly recognizable) and it will be your highest priority to take him out
as soon as possible as he is capable of doing tons of damage. Fortunately you can use
crowd control abilities on him to keep him moving around and interrupt his attacks. In
addition, about 2 minutes into this phase, you will see the announcement “Bloodwrath
reinforcements have arrived!” and 4 archers will spawn in the middle of the room. They
will then proceed to randomly target a player and fire arrows at them that deal moderate
damage; they will also sometimes switch targets. When the archers spawn, take them
out as soon as you can. About 2 minutes later (4 minutes into this phase), you will again
see the announcement “Bloodwrath reinforcements have arrived!” and this time a priest
and a warrior will spawn in the middle of the room. The priest will heal the other mobs
and the warrior is just plain annoying and will do quite a bit of damage on whoever he’s
attacking. Your first priority should be to take out the priest as he can heal the other
mobs; you can also interrupt his channels by watching when he speaks and then using
your crowd control abilities on him. The warrior is nothing special but also take him out
after you are done with the priest. You will have a total of about 6 minutes to kill all the
mobs that spawn during this phase or else they will be permanently shielded after the
announcement “Putrion’s aura shields the demokrons and Archdevas.” and will proceed
to attack you during the boss fight. You will get a 10 second warning before the phase is
about to end when you see the announcement “You think you can win. How wonderful.”
so quickly eliminate the rest of the mobs. Then it’s on to the boss fight.
Important Mechanics
Stun Drop: A medium red circle will appear around the boss. After about a second the
boss will drop down and stun (cleansable) anyone within the circle. If you get stunned, the
boss will proceed to target you for his next attack. Simply move out of the circle to avoid.
Tip: You can interrupt the boss’s channel by using the Priest’s Zenobia’s Vortex.
Rampant Charge: The boss will randomly target a player (purple agro circle) and then proceed to rush headlong at them and past them, trampling them over and dealing moderate damage. You can iframe out of the way as the boss will not follow you after locking on. He will also make a return trip back so stay clear out of his path until he is done.
Tip: You can interrupt the boss’s charge by using the Priest’s Zenobia’s Vortex.
Circle Slash: The boss will randomly target a player (purple agro circle), fly up into the air, and proceed to do a half circle shaped slash in the direction of that player. A large red circle will appear as the boss prepares for the attack. To avoid, do not stand on the immediate perimeter of the AOE circle; in other words get close to the boss or away from the boss. If hit, you will take moderate damage and be stunned (cleansable).
Tip: You can interrupt the boss’s channel by using the Priest’s Zenobia’s Vortex.
Flying Body Slam: The boss will randomly target a player (purple agro circle), fly up into the air, wait for a bit, and then thrust forward, dealing moderate damage. Simply get out of the way to avoid being hit.


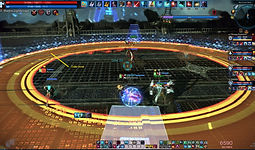
Boss #2: Perimos
This boss is tricky, especially if you are still learning. There are really 2 important phases
you need to watch out for as they can potentially result in a wipe if not executed properly.
The boss should be tanked in the middle of the room where he initially is so that when the
laser phases initiate (more on this below), it will be easier to see where it will shoot and so
the boss does not make a random leap back to the center of the room. The room is laid
out with 6 pylons (crystals), 3 on each side. These crystals are essentially your lifeline and
if all 6 are destroyed, your party will be immediately wiped. Basically, you must DPS the
boss fast enough before he is able to destroy all 6 crystals, so make sure that everyone
in your party is decently geared and can do enough damage or this will be a rough fight.
Important Mechanics
It’s Laser Time: When you see the announcement “Perimos is trying to destroy the aeonalis pylons!” and see the boss say “Time to bring this ship down!”, the boss will head to the center of the room and begin charging up his purple laser. Everyone must gather in front of the boss where he is aiming his laser and face tank it to reduce the damage dealt to the crystal. Each additional person tanking the laser will reduce the amount of damage each person takes. The approximate damage you will take based on how many people tanking it is listed below (damage is not flat):
1 person (RIP): 150k
2 people: 100k
3 people: 75k
4 people: 60k
5 people: 50k
6 people: 43k
7 people: 37k
In addition to dealing high damage, everyone hit will also be applied a strong poison
debuff (cleansable). The healer must make sure to quickly cleanse everyone after and
then heal them back to full health after each laser. Perimos will initiate this phase about
every 50 seconds or so after the initial one. If you thought that was all to this phase, well
guess again. From 100-70% and 29-0%, Perimos will only do one laser every 50 seconds.
However, from 69-30%, the boss will do 2 lasers in a row every time this phase goes off
(how fun!). Therefore, make sure your party keeps an eye on the boss’s HP percentage to
know whether he is going to do 1 or 2 lasers so you can gather to tank it accordingly.
Tip: Using a Mystic’s Thrall or a Warrior’s Smoke Aggressor will make it count as an additional person when tanking the laser and will reduce the amount of damage each person takes.
Tip: Make sure your healer knows how to heal through the phase when the boss does double lasers. For me, I like to use Kaia’s Shield to help tank and Healing Circle (use Heal Thyself for yourself) to heal the first laser and just Healing Immersion for the second laser (make sure to cleanse after each laser!).
Tip: If your party gets the boss down to <30% and there are still 4 or more crystals alive, you can most likely skip each laser phase and just DPS the boss down so you can kill him faster. Make sure everyone in your party is aware of this or else whoever is tanking the laser by themselves is going to get one shotted.
Even More Lasers: The boss will say “Small things… So bothersome… I’ll kill…” and will randomly target a player (purple agro circle) and then proceed to fire a red laser at them. The boss will follow you up until he shoots the laser so you will have to iframe it. If you do not dodge the laser, you will take massive damage.
Tip: Iframing the laser will take a lot of practice as there is not really much of an indicator before he shoots it. You can see him charging it so for now all I can offer is for you to feel the timing of it. Once I have a more accurate measurement I will update it here.
Tip: When the boss targets you, make sure you move out of the way of other players in addition to out of the way of any crystals, as this laser can and will damage crystals that get hit. The easiest is to stand towards the entrance of the room or the back of the room as there are no crystals present in those areas.
Other Mechanics
Fire Wave: The boss will say “Get back!” and then proceed to launch a cone shaped wave that will deal damage in front of him. Move away to avoid.
Swinging Party: The boss will say "Time to... break some rocks!" and will remove one of
his arms and then do a couple of pointing motions with it in front of him. He will then
proceed to move forward while rapidly swinging his arm around as a weapon, dealing
high damage to anyone in his way. Move out of his way to avoid.
Slamming Party: The boss will remove one of his arms and then slam it into the ground
in a small AOE in front of him. He will then proceed to do a couple more slams before
finishing. Simply avoid the area in front of him.
Spider Webs: The boss will kneel down/bend over on all fours and then proceed to spawn webs around him. Small webs will spawn to the left, right, in front of, and behind the boss in addition to spawning larger, more damaging webs diagonally (left front, right front, back left, and back right). You will receive moderate damage when hit by the webs and will be applied a slow debuff (cleansdable).
Roundhouse Swing: The boss will occasionally swing his arm around in a full circle, dealing moderate damage to anyone within the vicinity.


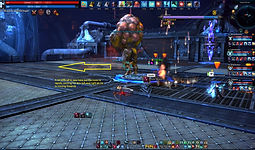


Boss #3: Darkan
If you though Perimos was bad, then wait till you get a load of this guy. Your first few
times will be extremely frustrating as it takes a while to get used to the bosses many
attack patterns in addition to his special mechanics and debuffs. Positioning for this boss
is extremely crucial as one of his attacks will hit everything on one side of him so you
need to know which way he is facing to avoid it. Ideally, the tank should face the boss in
one direction and the DPS and healer should be behind the boss in the opposite direction.
Make sure the tank keeps the boss steady in one place and to hold agro or you may end
up having a messy fight. In addition, many of Darkan’s attacks will apply a burning debuff
(cleansable) that will tick away at your HP if not taken care of so make sure your healer is
on the lookout and if you have the debuff make sure to get within range for the cleanse
and heal. The fight will not begin until you actually hit the boss, so whenever you are
ready give him a wake up call. At 90%, the boss will say “Time to show you… my inner
demon” and disappear. The boss will reappear in his true form and, once again, will not
begin attacking until you provoke him. So make sure you are in position and lets get the
party rolling.
Important Mechanics
Fire Sword Slash: This is the most important mechanic to master for this boss fight as it
is done frequently throughout the fight and can throw your entire party into disarray if too
many people mess up on it. Basically, the boss will launch a side attack (to the boss’s left
or right side) that will deal high damage and push you back substantially in that direction
in addition to applying a burning debuff (cleansable). There are 2 different ways that
Darkan can set off this attack. The first way is through his regular attack pattern. If you
watch the boss, he will frequently slam either his left or right sword into the ground in front
of him. Once you see him do this, start counting (with the first sword slam being 1). If the
boss does 4 sword slams in a row, the 4th slam will determine in which direction he will
cast his fire sword slash. The sword that is on the ground (the 4th slam) is the SAFE side
whereas the sword left hanging in the air is the DANGER side. To avoid, envision a
straight line dividing the boss into his left and right half and stand on the side where the
sword is on the ground. The boss will pause for second once the 4th sword slam is
completed before setting off the fire sword slash attack so use that time to quickly get into
position. To note, the boss will not always do 4 consecutive sword slams in a row and
then the fire sword slash attack so make sure you are watching the boss closely so you
don’t mess up and get caught in his other attack patterns. The other way that the boss can
use this attack is if you see him say “Dodge this!” and then slam one of his swords into the
ground. Quickly move to the safe side where the sword is on the ground like before to
avoid the attack.
Tip: If you get hit, make your way quickly back to the healer so they can cleanse you
and then back into position.
Tip: You can iframe the attack if you happen to be on the wrong side when it goes
off. Wait about a second from when the final sword slam hits and then hit your iframe.
Tip: Make sure that you are well onto the safe side as if you are too close to the
middle borderline, you can still get hit.
Blast Zone: The boss will rise up into the air and create a large AOE underneath him.
Everyone must enter the circle within a few seconds before the boss closes it off; anyone
not inside the circle will be killed at the end of this phase (similar to Fulminar’s annihilation
phase). Once the boss seals off the circle, one of the 3 zones, outer, middle, and inner
that will randomly become a danger zone. You must avoid these zones or you will take
fatal damage if you get hit. This will happen 3 times before the boss dissolves the circle
and you can move out again.
Tip: The boss is still vulnerable during this phase so make use of it and DPS the boss; although he will be in the air, his hitbox is still at the center of the circle.
Tip: If someone did not make it into the circle in time, a Priest can still pull them into the circle using Divine Intervention. Just make sure to react quickly once you are pulled inside as the area underneath you may quickly become a danger zone.
Flaming Sword Throw/Attack: The boss will randomly target a player (purple agro circle) and then proceed to quickly throw his sword at them, dealing high impact damage. In addition, this attack will follow up with streak lines appearing after the initial throw that will deal high damage as long as you stand on it and also apply the burning debuff (cleansable). These streak lines will disappear after a few seconds. The other version of this will have the boss slam the ground with his sword and release a straight line fire attack at you; there will be 2 hits similar to the previous attack except this one will not leave a burning streak trail. Only the second hit from this attack will give you the burning debuff (cleansable).
Tip: The boss does not follow you after initially targeting you so make sure you get out of the way and try not to get any party members caught in it.
Fire Explosion: The boss will say “All they are is dust…” and rise up into the air, wait a few seconds, and then slam the ground. Anyone within 20m of the boss will be instantly killed. Simply move away from the boss till he is done.
The Reaper: The boss will say “The fire will consume you!” and then disappear. A ghost mob will then spawn that will proceed to target one player only by saying “*Player*… You’ll die…” and try to kill them. Each hit from the mob will deal a flat 30k damage so kite the mob around and quickly kill it. If you fail to kill the mob within a minute, the party will wipe.
Tip: One tactic that you can employ is that when the mob spawns, let only the healer attack it and do a heal to attract it. This will make the mob choose the healer as its target so the rest of the party can focus on killing the mob. The boss is susceptible to crowd control so use that to keep him in place.
Meteor Shower: The boss will fly up into the air and everyone will get a purple agro circle on them. The boss will then place an AOE circle on everyone that will follow them around just until it takes effect, dealing moderate impact damage. Your party must move to the edges of the field as these circles will leave a short, lived burning area that will deal damage if you stand on it.
Tip: To dodge the impact damage, keep moving as the AOE circle is on you. Toward the end, you will see the AOE circle disappear, and then reappear. When it reappears, it will have locked its location so you can then use your iframe to get out of it. If you iframe too early, the AOE will still follow you and you will still be hit.
Roundhouse Fire Slash: The boss will do a quick roundhouse attack with his sword,
dealing high damage to anyone within the vicinity. It will also apply the burning debuff
(cleansable).
Tip: Melee classes will have to watch out for this attack and dodge it if possible.
Ranged classes shouldn’t get hit if they are at least 10m behind the boss.
Fire Torpedo: The boss will spin and advance forward towards a player, dealing moderate
damage. This attack may look like it will push you back, but it will not.
Tip: If the boss misses you and charges past you, don’t follow the boss and wait for
him to come back to you. He will usually use another Fire Torpedo to get back.
Enrage: When you push Darkan past 25% he will announce "I'll show you true power!"
and receive a buff that makes him faster and hit harder. Be mindful of his attacks and
make sure you react quicker to avoid being hit.